讚嘆公婆!感恩公婆🙏
各位觀眾!收到新家禮物了 🎁
.
熱騰騰🥳 收到最新的小美機 Thermomix TM6 🤩!I am so excited !
.
還記得去年我帶兩個孩子在🇬🇧百貨公司看小美機器demo嗎?驚為天人堪稱是廚具界的iMac,讓我這個天天煮餐餐煮的主婦心動不已!那篇發文廣受關注跟回覆,全數都是瘋狂勸敗我的媽媽們💪。但高單價的小美機讓我一直卻步🤣
.
故事回顧:https://bit.ly/2ZMA4LH
.
他們私下line老公:「你幹嘛不讓Ting買啦!她又從來不跟你要求什麼,也不是奢侈買名牌包包的人,#你不買 #我們買給他!」😍 是不是很霸氣!
.
這件事我完全不知道,直到搬新家後,老公默默轉一筆錢給我說:「嗯!爸媽說要買小美機給妳,妳去買吧!」我感動的痛哭流涕~~一直說「真的嗎!真的嗎!💕😭」。
.
剛好英國🇬🇧預計六月會上市最新機種T6,我們就先採預購方式,直到上週終於拿到機器了💕 迫不及待開箱!放在我們家廚房剛剛好!孩子們一下課也迫不及待叫我開箱使用。
.
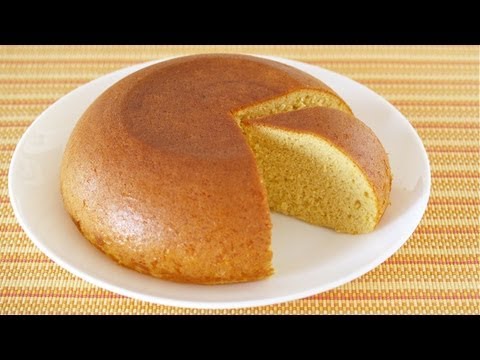
翻一翻櫃子只有麵粉、雞蛋跟黑糖。就選了最基本的sponge cake 食譜,按照步驟做了一個超簡單的風味的🍰蛋糕。
.
小美機最驚人的地方就是,所有功能都全部內建在一台機器!我完全不用再拿磅秤、一堆小碗、手持攪拌器...連圍裙都不用穿😎 這是有史以來做蛋糕最優雅、最不混亂「乾淨」的一次了!amazing!
.
在這裏真心感謝🙏婆婆!送禮送到心坎裡是我最需要的禮物!彷彿幫我在廚房添了一位小幫手!這份禮物🎁 不但贏得媳婦的心,又同時無形中,照顧到心愛的兒子跟孫子們飲食。win win 💕 真是有智慧的好婆婆!
.
媽媽我會好好利用這台廚房界的iMac💪 讓孩子們跟老公品嚐更多home made 美食。接下來目標是:水餃🥟、蔥油餅、包子、油飯、炒肉鬆、各式蛋糕。
.
#歡迎大家推薦我不錯的食譜
同時也有13部Youtube影片,追蹤數超過92萬的網紅ochikeron,也在其Youtube影片中提到,4/4 was my darling's birthday, so I made this shortcake for him :) I received many requests for shortcake, so I'm finally making this tutorial!!! --...
「home made sponge cake」的推薦目錄:
home made sponge cake 在 Sarimah Ibrahim Facebook 八卦
We made a Quick dash to @peggyporschenofficial to have their fabulous victoria sponge(my fav cake!) before we fly back to Kl tonight..💕🍰🌸🌼
.
Look at that slice of cake..because of that i shall be running up and down the plane aisles later 😲😁🤤
.
Bye bye London home...for now..💖
.
#londonhome #kensington #peggyporschen #eburystreet #victoriasponge #springishere #keepingupwiththenadzimuddins #nadzimuddinclan
#sarimahibrahim #sarimah #sarjamtravels #alhamdulillah #mythrill #yourthrill #muamalaysia #healthyskin #produkmalaysia #kulitsihat #londontown #workhardtravelwell #thrillingtravels #thrillinglife #thrillers #thrillinglondon #travelwiththrill #holidaythrill #jomthrill
#Dessertthrill #cakethrill
home made sponge cake 在 Dairy & Cream Facebook 八卦
Rain and Shine🌤 Rain and Shine. In any case, it's best to stay at home to enjoy a piece of matcha kuromitsu bavarois cake 🍓 in fraisier style
Using pure black sugar (黒糖) yields a sponge cake of unexpectedly moist and refined texture, with a nice malty aroma that lingers on☺️ Cream made using Matchaya matcha tea powder
#dairycreamkitchen#matcha#homemade#dessert
home made sponge cake 在 ochikeron Youtube 的評價
4/4 was my darling's birthday, so I made this shortcake for him :)
I received many requests for shortcake, so I'm finally making this tutorial!!!
---------------------------------
Strawberry Shortcake (Birthday Cake Recipe)
Difficulty: medium
Time: 2 hours (6 hours or a day cooling time)
Number of servings: 1 cake
Necessary Equipment:
18cm (7.1-inch) round cake pan
electric mixer
Ingredients:
((Sponge Cake))
2 eggs *room temperature
60g (2.1oz.) granulated sugar
60g (2.1oz.) cake flour
20g (0.7oz.) melted unsalted butter
((Syrup))
20ml hot water
1/2 tbsp. granulated sugar
1 tsp. rum *kirsch, brandy, or any kind of liquor you like
((Decoration))
fresh strawberries
300ml fresh cream (heavy whipping cream)
1&1/2 tbsp. granulated sugar
a few drops vanilla extract
1 tbsp. rum *kirsch, brandy, or any kind of liquor you like
Directions:
((Sponge Cake))
1. Line the round cake pan with parchment paper. Preheat the oven to 170C (338F).
2. Beat eggs with wire whisk in a metal bowl. Mix sugar and place it over a bowl of hot water and melt the sugar and warm them up to body temperature. Then remove from the hot water and beat the batter on high speed with an electric mixer until white and fluffy. Then on low speed, beat for about a minute to set the texture.
3. Sift in flour little by little and gently cut through the mixture with wire whisk until somewhat combined. Then using spatula, sprinkle melted butter, and quickly lift up the batter to mix.
4. Pour the batter from heights of 11 inches (30 cm) into the pan (like ribbon) and drop the pan lightly on the counter to raise the air bubbles out of the batter.
5. Bake at 170C (338F) for 25 minutes.
6. Place a cutting board and a paper towel on a wire rack. Then place the cake pan upside down and cool with the pan on top.
7. When it's completely cool, wrap with plastic wrap and rest the sponge cake in the fridge for a few hours. *you can store it in the fridge for 2 to 3 days and decorate the cake when needed
((Syrup))
1. Mix granulated sugar and hot water until dissolved. Then mix rum (if you like).
((Decoration))
1. Combine fresh cream, granulated sugar, vanilla extract, and rum (if you like) in a dry, clean bowl. Float the bottom of the bowl in ice water, whisk the cream until it forms a soft peak.
2. Slice the sponge cake crosswise into 2 layers. Gently brush the sponge cake with syrup (brush all the surfaces which will be coated with cream).
3. Place one layer of the sponge cake on a plate. Coat the surface of the sponge cake evenly with the cream. Place cut strawberries over the creamed surface. Then coat again with the cream. Place another layer of sponge cake, and frost top and side with the cream. Garnish with strawberries.
4. Rest the cake in the fridge for 1 or 2 hours before you serve. In this way, you can easily cut the cake.
レシピ(日本語)
http://cooklabo.blogspot.jp/2012/04/blog-post_18.html
---------------------------------
This sponge cake was a success!
Happy 37th birthday to my darling XOXO
What is Cake Flour?
http://createeathappy.blogspot.jp/2012/05/what-is-cake-flour.html
Music by
Josh Woodward
Midnight Sun
Josie Has the Upper Hand - Instrumental
http://www.joshwoodward.com/
Follow me on social media. If you have recreated any of my food, you can share some pictures #ochikeron. I am always happy to see them.
♥FOLLOW ME HERE♥
http://instagram.com/ochikeron/
https://www.facebook.com/ochikeron
https://plus.google.com/+ochikeron
http://twitter.com/ochikeron
♥My COOKBOOK available on Amazon Kindle♥
http://amzn.to/2EwR3ah
NO MORE hard copies... those who got one are lucky!
♥More Written Recipes are on my BLOG♥
http://createeathappy.blogspot.com/
♥My Recipe Posts in Japanese♥
http://cooklabo.blogspot.jp/
http://cookpad.com/ami
http://twitter.com/alohaforever
♥and of course PLEASE SUBSCRIBE♥
http://www.youtube.com/user/ochikeron?sub_confirmation=1
![post-title](https://i.ytimg.com/vi/RE8uha6l32M/hqdefault.jpg)
home made sponge cake 在 ochikeron Youtube 的評價
Roll Cake is a type of sponge cake roll. In Japan, we call it "Roll Cake" but in some other countries people call it Swiss roll or jelly roll.
I used to make it every week when I first knew that I can make it at home. But now I haven't made it for a long while... maybe for more than 5 years! LoL
Anyways, thanks to my recipe, I could make it again! hehe
Some people asked me about my hair, so here I will link about my NEW hair coloring product!
Palty Bubble Hair Coloring: Marshmallow Ash
http://createeathappy.blogspot.com/2011/11/palty-bubble-hair-coloring-marshmallow.html
---------------------------------
Japanese Roll Cake
Difficulty: medium
Time: 60min
Number of servings: 8 pieces
Necessary Equipment:
9-inch square brownie pan
electric mixer
Ingredients:
((Sponge Cake))
2 egg
50g (1.8oz.) superfine sugar
35g (1.2oz.) cake flour
20g (0.7oz.) milk (room temperature)
((Filling))
200ml fresh cream (heavy whipping cream)
1 tbsp. granulated sugar
some fruits of your choice: strawberry, kiwi, canned fruits are okay!
Directions:
((Sponge Cake))
1. Line the brownie pan with waxed paper or parchment paper. Preheat the oven to 180C (350F).
2. Beat eggs and sugar with wire whisk in a metal bowl. Placed it over the pan of hot water and melt the sugar and warm them up to 40C (104F).
3. Then with an electric mixer, beat the batter on high speed for about 5 minutes until white and fluffy. Then on low speed, beat for about 2 minutes to set the texture.
4. Sift in flour and fold together with spatula for about 10 times.
5. Add milk and fold together with spatula for about 50 times until combined.
6. Spread the batter in the brownie pan and drop the pan lightly on the counter to raise the air bubbles out of the batter.
7. Bake at 180C (350F) for 11-12 minutes till lightly brown. (Depending on the heat of the oven, cooking time may differ, so please watch out.)
8. When it's done, drop the pan lightly to prevent shrinking. Remove the sponge cake from the pan by lifting the wax paper and place it on a wire rack to cool.
9. When it's cool enough, remove the parchment paper and place the sponge cake on the parchment paper with the brown side up.
((Filling))
1. Combine fresh cream and granulated sugar in a dry, clean bowl. Float the bottom of the bowl in ice water, whisk the cream until it forms a soft peak.
2. Dice the fruits of your choice.
3. Coat the surface of the sponge cake evenly with the cream. Place the fruits over the creamed surface (leave an inch at both ends).
4. Wrap the cake in the parchment paper and put in a fridge for 30 minutes to set.
5. Cut into round pieces! The best way to cut the cake is to use a knife that has been warmed in hot water. Dip the knife in hot water, wipe, and cut. Repeat this each time you cut!
レシピ(日本語)
http://cooklabo.blogspot.com/2011/11/blog-post_18.html
---------------------------------
It's a great recipe for holiday seasons: Thanksgiving, Christmas, New Year's party :D
What is Cake Flour?
http://createeathappy.blogspot.jp/2012/05/what-is-cake-flour.html
Music by
AXIAL
Papaloko
http://www.jamendo.com/en/
♥FOLLOW ME HERE♥
http://instagram.com/ochikeron/
https://www.facebook.com/ochikeron
https://plus.google.com/+ochikeron
http://twitter.com/ochikeron
♥My COOKBOOK available on Amazon Kindle♥
http://amzn.to/2EwR3ah
NO MORE hard copies... those who got one are lucky!
♥More Written Recipes are on my BLOG♥
http://createeathappy.blogspot.com/
♥My Recipe Posts in Japanese♥
http://cooklabo.blogspot.jp/
http://cookpad.com/ami
http://twitter.com/alohaforever
♥and of course PLEASE SUBSCRIBE♥
http://www.youtube.com/user/ochikeron?sub_confirmation=1
![post-title](https://i.ytimg.com/vi/lxP5Osz0DnY/hqdefault.jpg)
home made sponge cake 在 ochikeron Youtube 的評價
♥FOLLOW ME HERE♥
https://www.facebook.com/ochikeron
https://plus.google.com/111926234494130917642
http://twitter.com/ochikeron
http://instagram.com/ochikeron/
Kasutera (Castella) is a very popular Japanese sponge cake made from a few ingredients.
It is a very typical Oyatsu (snack) in Japan :)
I am going to bake it in a rice cooker, but of course you can bake it in an oven!
I don't recommend baking any kind of cake in a really good rice cooker (it can damage your pot), so please try if you don't mind it!!!
FYI from Wikipedia:
Now a specialty of Nagasaki, Kasutera was brought by way of Portuguese merchants in the 16th century. The name is derived from Portuguese Pão de Castela, meaning "bread from Castile". Castella cake is usually sold in long boxes, with the cake inside being approximately 27 cm long. It is somewhat similar to Madeira cake, also associated with Portugal, but its closest relative is pão-de-ló, also a Portuguese cake.
There are similar types of sponge cakes named after the same fashion, in French: Pain d'Espagne, in Italian: Pan di Spagna, in Portuguese: Pão de Espanha, in Romanian: Pandişpan, in Bulgarian: пандишпан, in Greek: Pantespani, in Turkish: Pandispanya (Castile is a former kingdom of Spain comprising its central provinces, thus Pain d'Espagne and other variants are quasi-synonymous to "bread from Castile").
---------------------------------
Kasutera
Difficulty: Very Easy
Time: 2hrs (incl. cooking time)
Number of servings: N/A
Ingredients:
3 eggs
90g (3.2oz.) sugar
45g (1.6oz.) cake flour*
45g (1.6oz.) bread flour (strong flour)*
2 tbsp. milk
1 tbsp. honey
butter
*you can use 90g (3.2oz.) all purpose flour instead
Directions:
1. Warm the milk in a saucepan. Add honey and mix well.
2. Place the eggs and sugar in a large bowl. Beat them with an electric mixer until white and fluffy.
3. Add 1 in 2. Place the bowl over a pan of hot water. Mix until the batter continuously drips back into the bowl like a ribbon when you scoop it up.
4. Sift in flour and gently cut through the mixture with a spatula until combined.
5. Butter the pot of the rice cooker and pour in the mixture. Drop the pot lightly on the counter to raise the air bubbles out of the batter. Place the pot in the rice cooker, close the rice cooker, then press the button to start. *When it is half-baked, press the button to start (cook) once again.
6. When it's done, let cool on a wire rack until warm. Then place it in a plastic bag (to keep it moist) to cool completely. It tastes even better the next day after the flavors have settled!
How to bake in the oven:
Bake in an oven at 170C (338F) for 10 minutes. Then turn down to 140C (284F) and bake for 40-45 minutes.
レシピ(日本語)
http://cooklabo.blogspot.jp/2013/03/blog-post_21.html
---------------------------------
Music by
Josh Woodward
Are You Having Fun? (Instrumental Version)
http://www.joshwoodward.com/
http://www.youtube.com/joshwoodward
♥FOLLOW ME HERE♥
http://instagram.com/ochikeron/
https://www.facebook.com/ochikeron
https://plus.google.com/+ochikeron
http://twitter.com/ochikeron
♥My COOKBOOK available on Amazon Kindle♥
http://amzn.to/2EwR3ah
NO MORE hard copies... those who got one are lucky!
♥More Written Recipes are on my BLOG♥
http://createeathappy.blogspot.com/
♥My Recipe Posts in Japanese♥
http://cooklabo.blogspot.jp/
http://cookpad.com/ami
http://twitter.com/alohaforever
♥and of course PLEASE SUBSCRIBE♥
http://www.youtube.com/user/ochikeron?sub_confirmation=1
![post-title](https://i.ytimg.com/vi/OO8LDK9gljs/hqdefault.jpg)